Community guide
How to Play Choicer Voicer Dub Mode — Beginner Guide
Learn how to play Choicer Voicer Dub Mode: choose a Dub Pack, record your lines, retry takes, watch the finished Dub, and save it for replay.
Updated Sep 6, 2026
Complete your first Dub from choosing a Pack to recording your lines, watching the finished scene, and saving it for replay.
This guide covers Dub Mode in the desktop game. The browser player is a separate experience.
Your first session
Your First Dub in 8 Steps
Before you start
You only need three things
The official page currently recommends version 0.5.3 for Windows and Linux.
Check the official game page ↗Test a short phrase before starting a long scene.
Test your microphone →Install a Pack and make sure it appears before starting.
Install a Dub Pack →Start the game
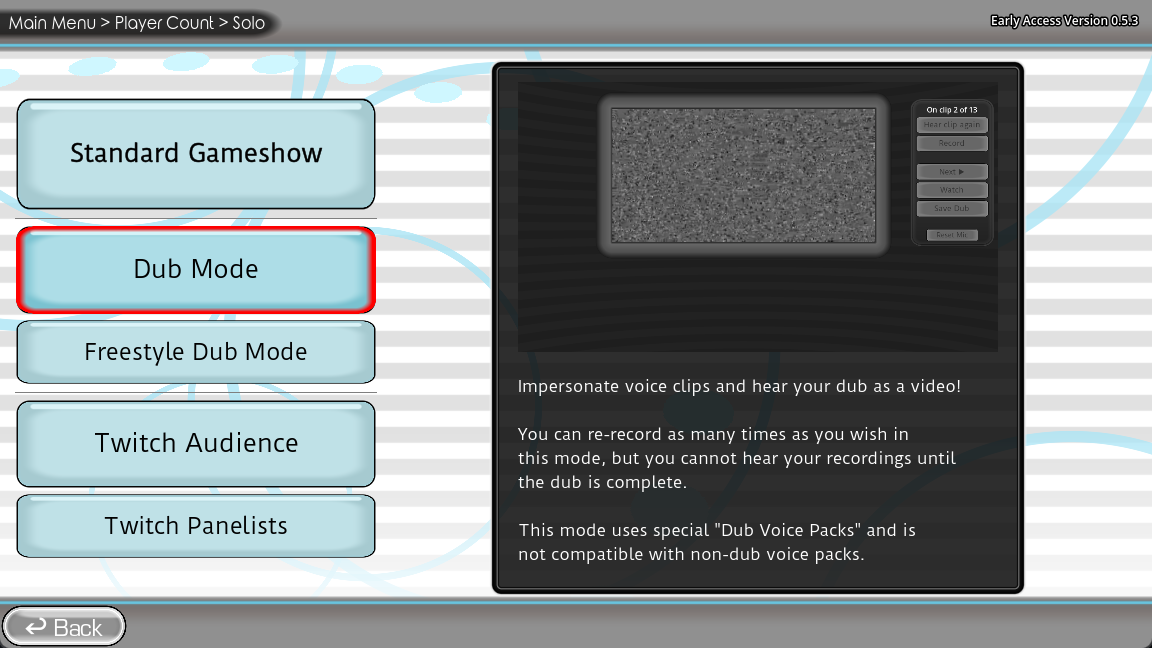
Open Dub Mode
Start The Choicer Voicer and enter the Dub Mode flow. If Dub Mode is missing, check that you are using a current 0.5.x build rather than an older version.
Pick a scene
Choose a Dub Pack
Select the Pack you want to dub. The selection screen may show Pack details such as clip count, characters, and duration. For a first try, choose a short Pack with only a few clips.
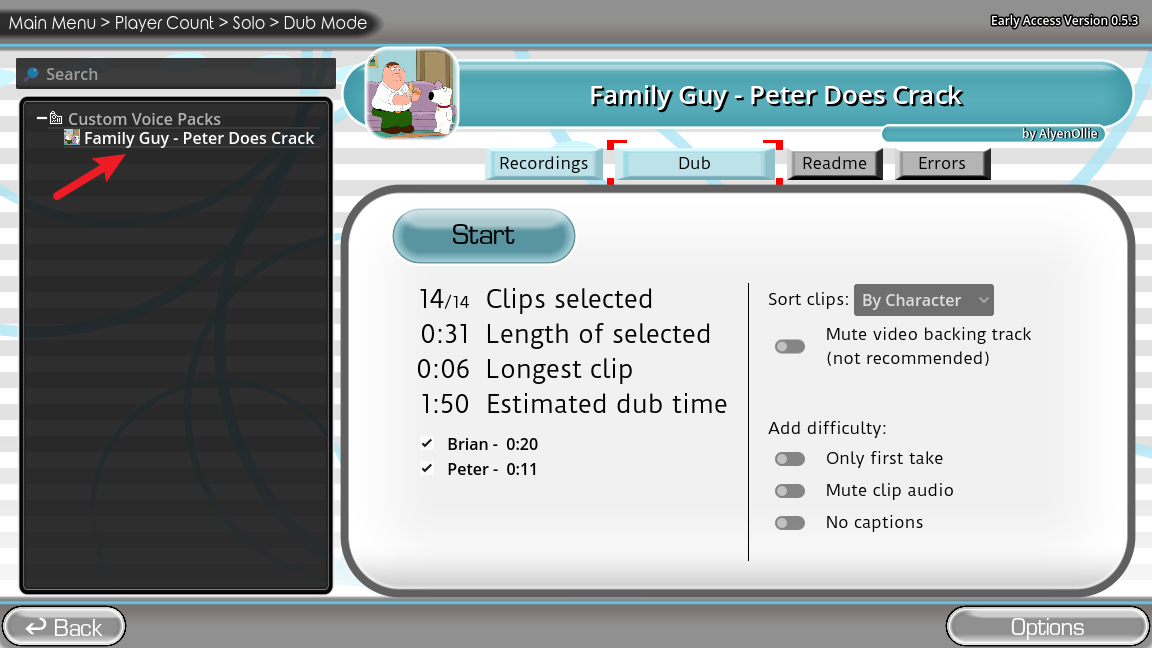
Stop here and fix the installation first. Open the Pack Not Showing guide →
Set up the session
Choose characters or clips
Some Packs let you choose which characters or clips to include. Select what you want to perform, then press the screen’s Start button.
Learn the line
Listen to the original line
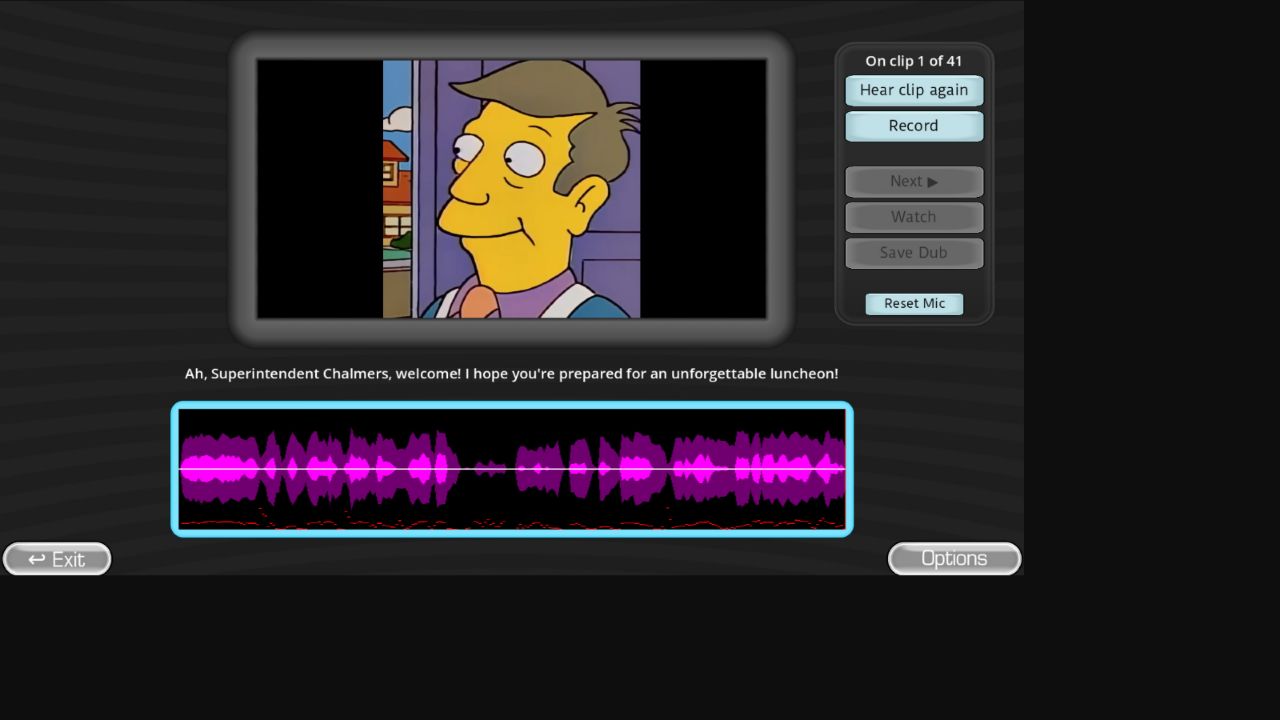
Each clip gives you a line to perform. Listen to the original first so you can hear the timing, pauses, energy, and delivery.
Perform the line
Record your line
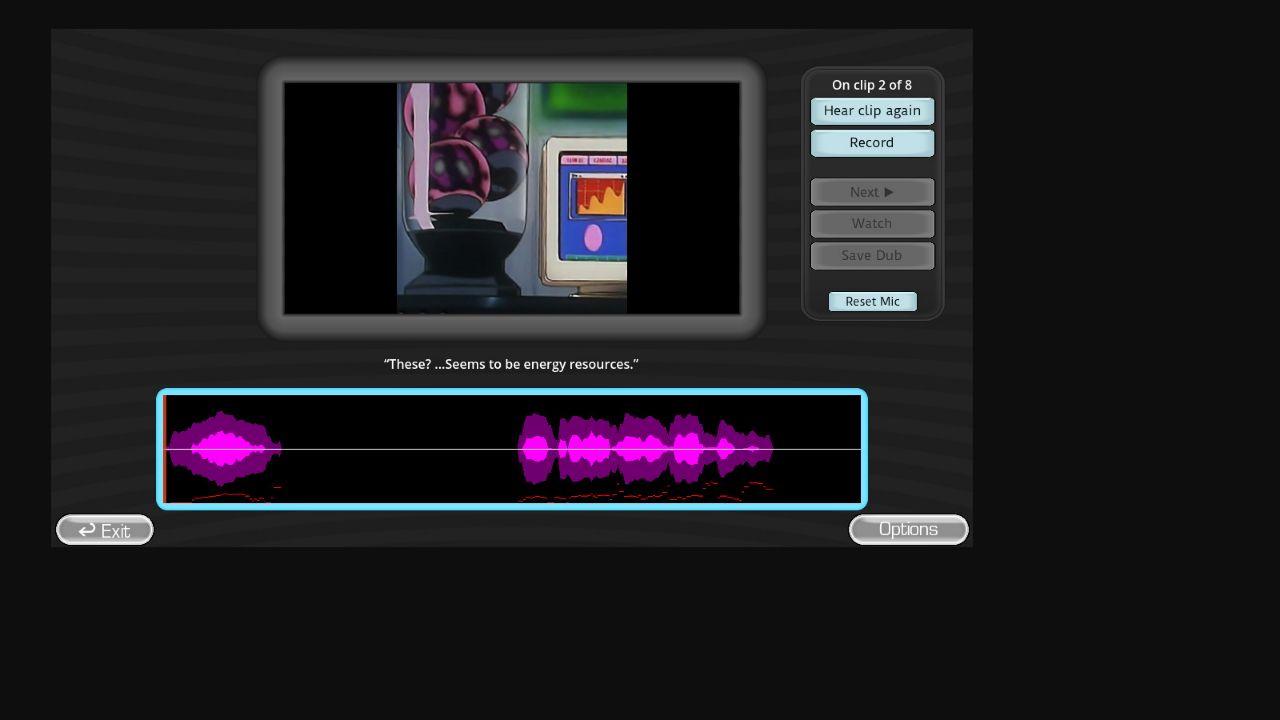
Click Record, wait for the timing cue, and speak when the clip begins. You do not have to copy the original perfectly—the fun is making the scene your own.
Keep moving
Retry or continue to the next clip
You do not need a perfect take. If the timing or performance feels wrong, record the current line again. When you are happy, continue to the next clip.
Finish the scene
Watch and save your finished Dub
Complete the selected clips, then use the available Watch or Cinema action to see the scene with your recorded lines played back in sync. Save the Dub if you want to replay it later.
See your recorded lines played back with the Dub Pack’s video and timing.
Keep the performance data and audio for replay inside the game.
Saving a Dub does not directly create a shareable video file.
Version 0.5.3 can preserve Dub progress between clips. Reopen the same Pack and check whether the game offers to continue the unfinished Dub. This is a recovery option, not a guarantee that every crash can be recovered.
Quick reference
Dub Mode controls
Try this later
What is Freestyle Dub Mode?
Regular Dub Mode guides you through clips one at a time. Freestyle Dub Mode plays the scene more continuously for a faster, looser performance.
Dub Mode Beginner FAQ
Do I need a Dub Pack to use Dub Mode?
Yes. Dub Mode needs a compatible Dub Pack with a scene and its timing data. If you have not installed one yet, start with the Dub Pack installation guide.
Where can I get Choicer Voicer Dub Packs?
Browse the Pack catalog, then follow each Pack’s original creator-source link. Creator notes and source files take priority over this general guide.
Why is my Dub Pack not showing?
Stop before starting the game and use the Pack Not Showing guide. It checks extraction, folder nesting, the packs_voice directory, Pack type, and the game mode.
Can I redo a line?
Yes. Retakes are normal. Record the current line again if the timing, volume, or performance is not what you want, then continue when you are ready.
Can I save my finished Dub as an MP4?
No. Save Dub stores the performance data and audio for replay inside the game; it does not directly create an MP4 video file.
What should I do if my microphone does not record?
Try a short microphone test first, then use the Microphone Troubleshooting guide for permission, device, audio-format, delay, and replay checks.